
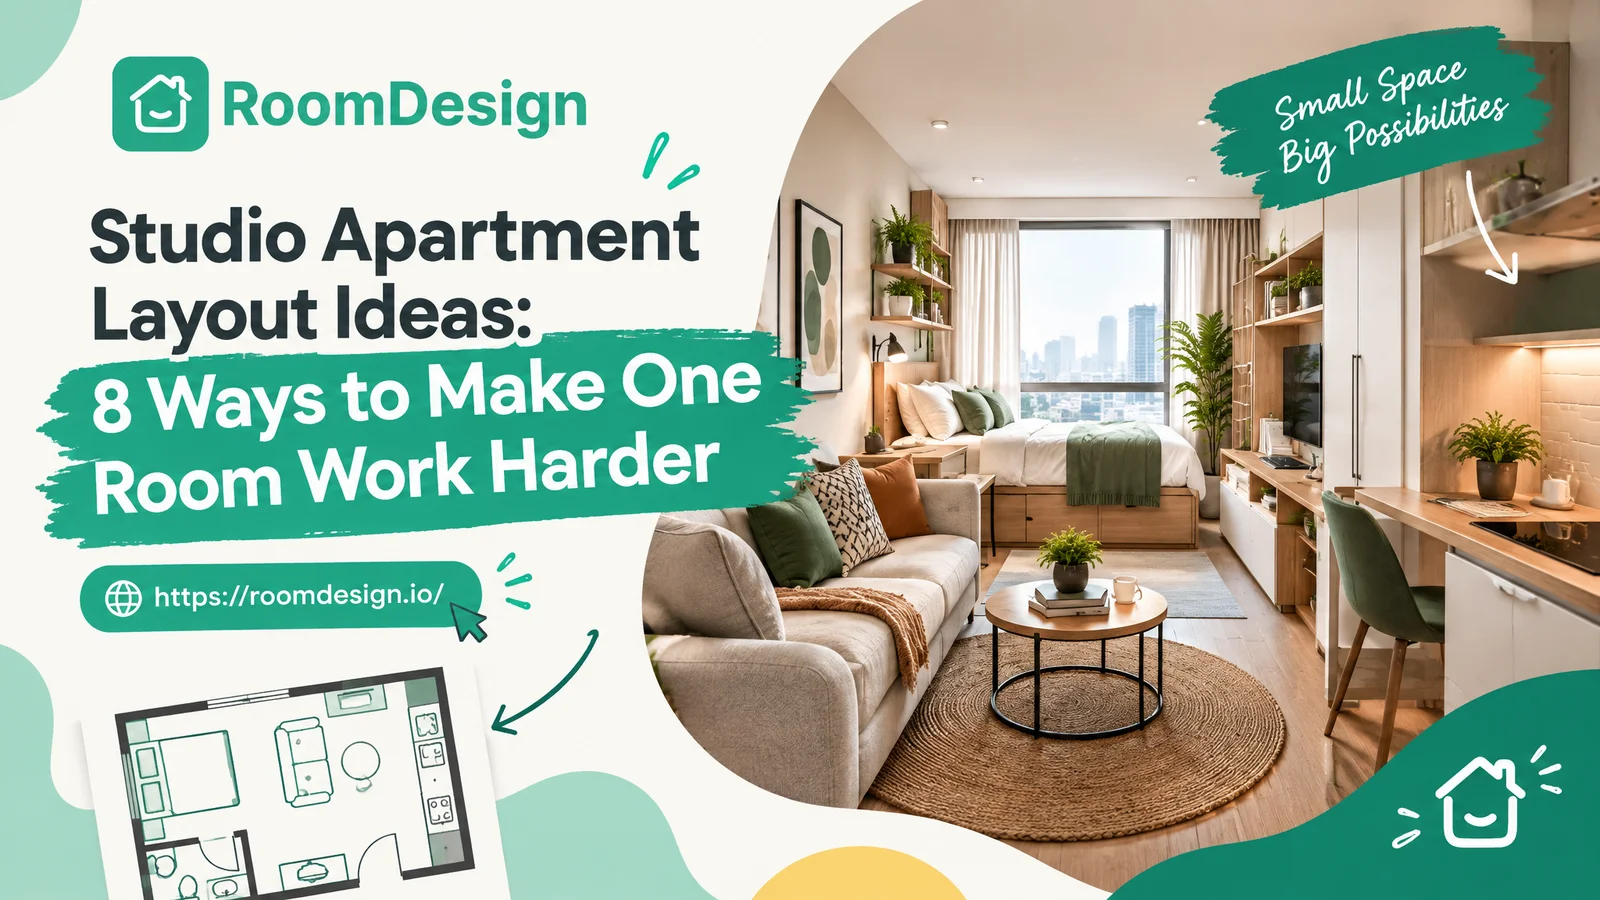
A studio apartment needs to support several parts of your day in one open room. The best layout usually starts with three decisions: where the bed goes, how you will walk from the entrance to the kitchen and bathroom, and which activity deserves the best natural light. Once those are settled, furniture can create useful zones without adding walls.
Below are eight studio apartment layout ideas for different room shapes and priorities. Each includes a simple way to explore the arrangement with RoomDesign. Use the ideas as starting points, then check your own measurements: a convincing image cannot prove that a sofa fits or a cabinet door opens.
Quick answer: In a narrow studio, keep the main walking route clear and place large furniture along one side. In a wider room, use the sofa or an open shelf to separate sleeping and living areas. If you have a recess, try the bed there first. Compare two or three options before buying anything.
Start With Your Actual Studio, Not an Ideal Floor Plan
Sketch the room and mark the entrance, bathroom door, fixed kitchen, windows, radiators, outlets, and built-in storage. Measure the walls and the furniture you already own. Then list your non-negotiables: a full-size bed, a proper desk, a dining spot, space for guests, or extra clothes storage.
Mark the route you use most often—usually entrance to kitchen, bathroom, and bed. A layout that makes that route awkward will feel inconvenient every day, however attractive it looks in a rendering. Check doors and drawers in their open positions, not just closed. Keep windows, heat sources, ventilation, and exits functional.
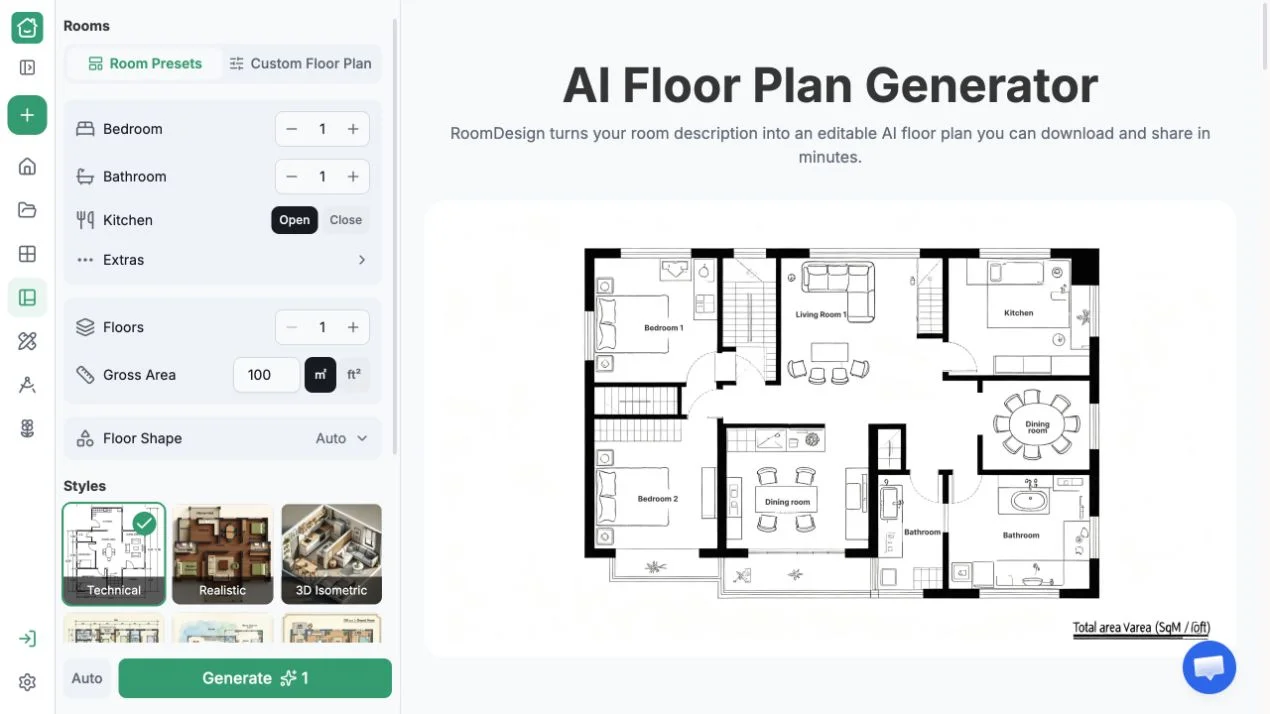
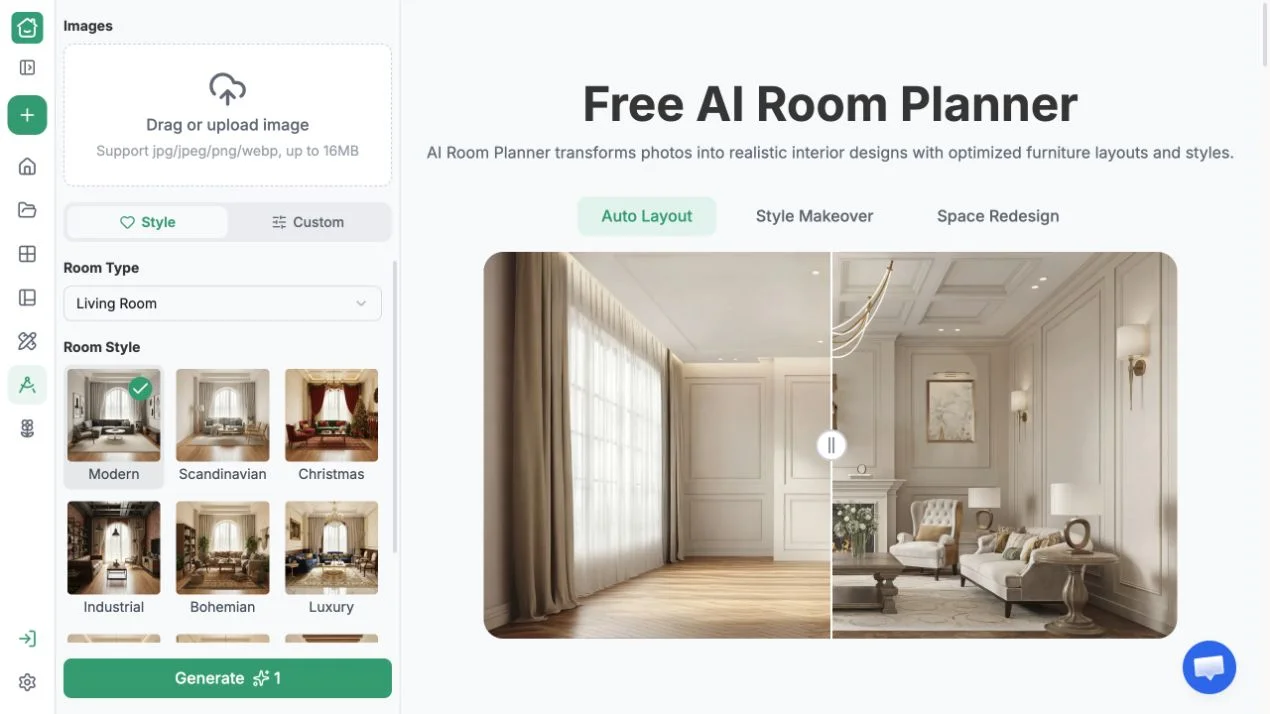
If you are still exploring a new space, use RoomDesign's AI Floor Plan Generator to enter the approximate area, floor shape, room requirements, and open-kitchen preference. It generates a labeled 2D concept with a 3D view. For an existing rental, the AI Room Planner accepts a room photo and offers Auto Layout, Style Makeover, and Space Redesign modes. The floor-plan tool helps compare relationships; the photo tool helps imagine how a furnished room might feel. Neither replaces your measured sketch.
The diagrams below keep the entry, kitchen, bathroom, and window in the same places so you can compare furniture priorities. They are original illustrations, not scaled floor plans. Use them to compare ideas rather than copy dimensions.
1. Put the Bed in a Corner to Free the Center
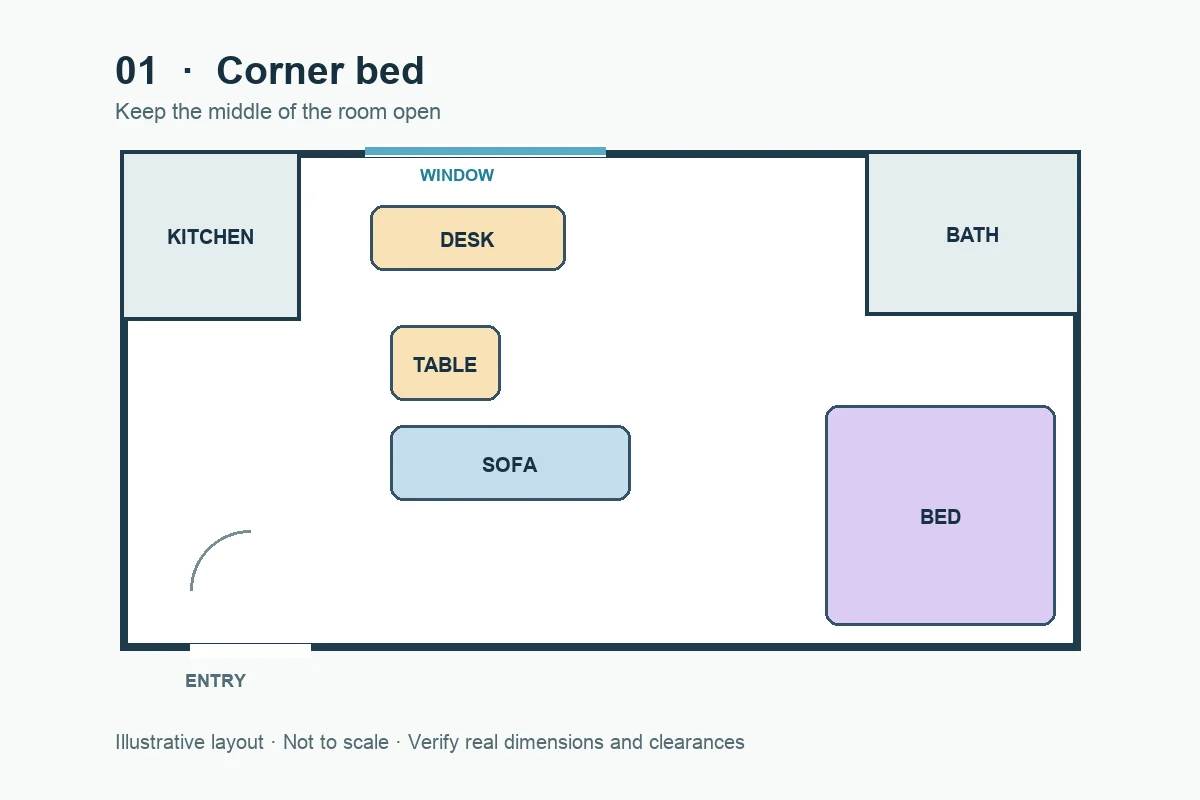
Best for: A compact, roughly square studio where a full-size bed matters more than access from both sides.
Push the bed into the quietest corner, ideally away from the kitchen's busiest edge. This leaves a larger continuous area for a sofa, table, and walking path. A small wall shelf can replace a bulky bedside table. The trade-off is that one person may have to climb across the bed, so this is less convenient for two sleepers.
Try it in RoomDesign: Create one concept with the bed in the corner and another with it centered on a wall. Compare how much uninterrupted floor remains for the living area. In a photo-based Room Planner preview, look at the view from the entrance: if the bed dominates it, a curtain or open shelf may help.
2. Turn an Alcove Into a Sleeping Nook
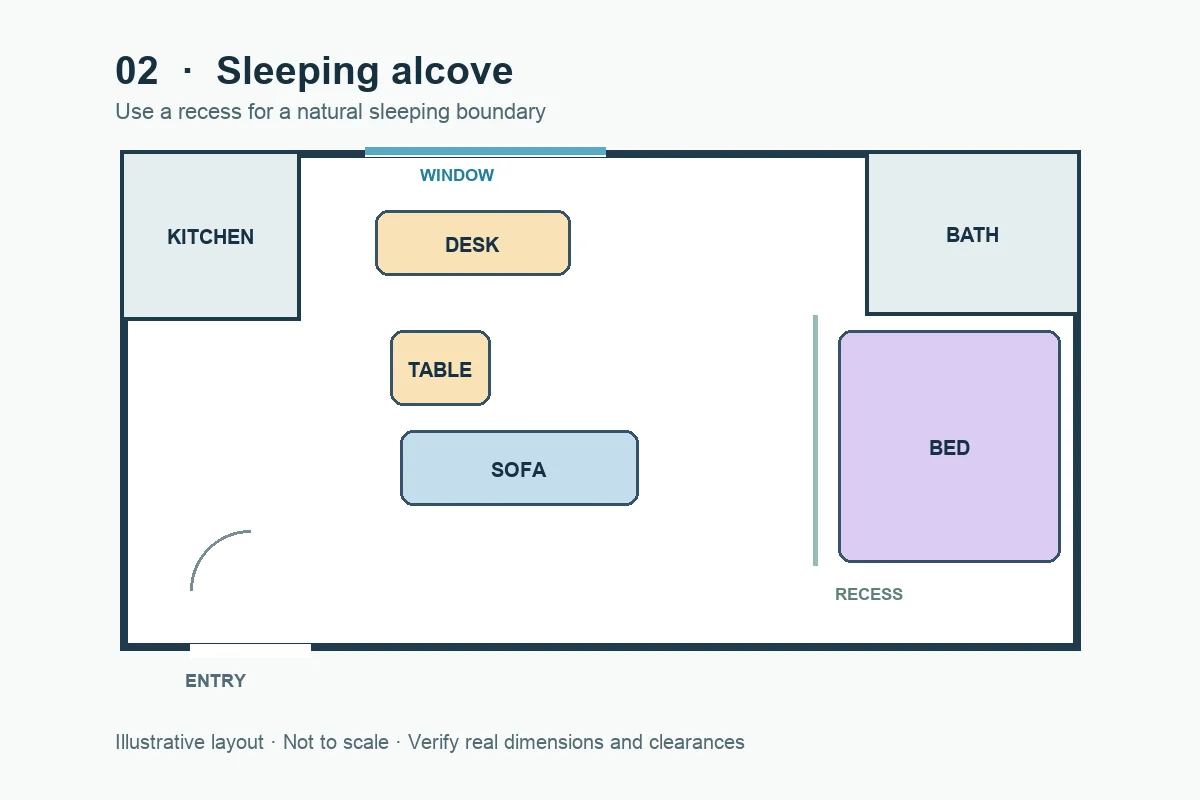
Best for: A studio with a recess that is deep enough for your mattress and usable access.
An alcove gives the sleeping area a natural boundary. A curtain can provide visual privacy without taking the floor space of a solid partition. Put closed storage nearby so the nook does not become a pile of clothes. Measure the alcove in several places; old walls are not always square, and a mattress that fits on paper may still leave no practical room to make the bed.
Try it in RoomDesign: Describe the recess in the custom floor-plan brief and compare a bed-in-alcove concept with one that uses the alcove as a desk. Treat the generated wall and bed proportions as illustrative. Your tape measure decides whether either option works.
3. Use the Sofa Back as a Soft Divider
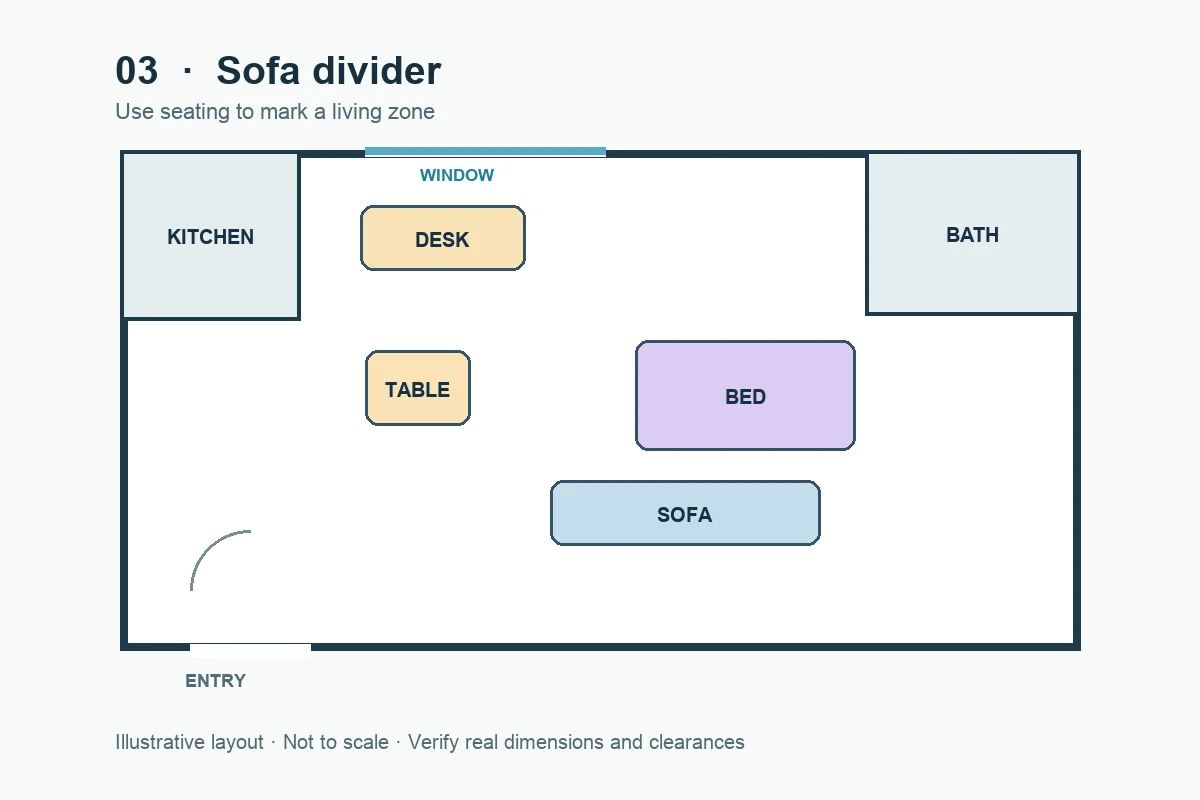
Best for: A wider studio where the sofa can float without obstructing the main route.
Place the sofa between the sleeping and living areas, with its back toward the bed. This gives each side a clear purpose while keeping the room open to daylight. A slim console behind the sofa can add storage, but only if it does not squeeze the walkway. Choose the sofa's position before picking a rug or television location; it sets the direction of the whole room.
Try it in RoomDesign: Generate one layout with the sofa against a wall and one with it floating. Compare the route around both ends, then preview the living zone with AI Room Planner. A rendered room may make a gap look generous, so tape the sofa footprint on the floor before deciding.
4. Separate the Bed With an Open Bookcase
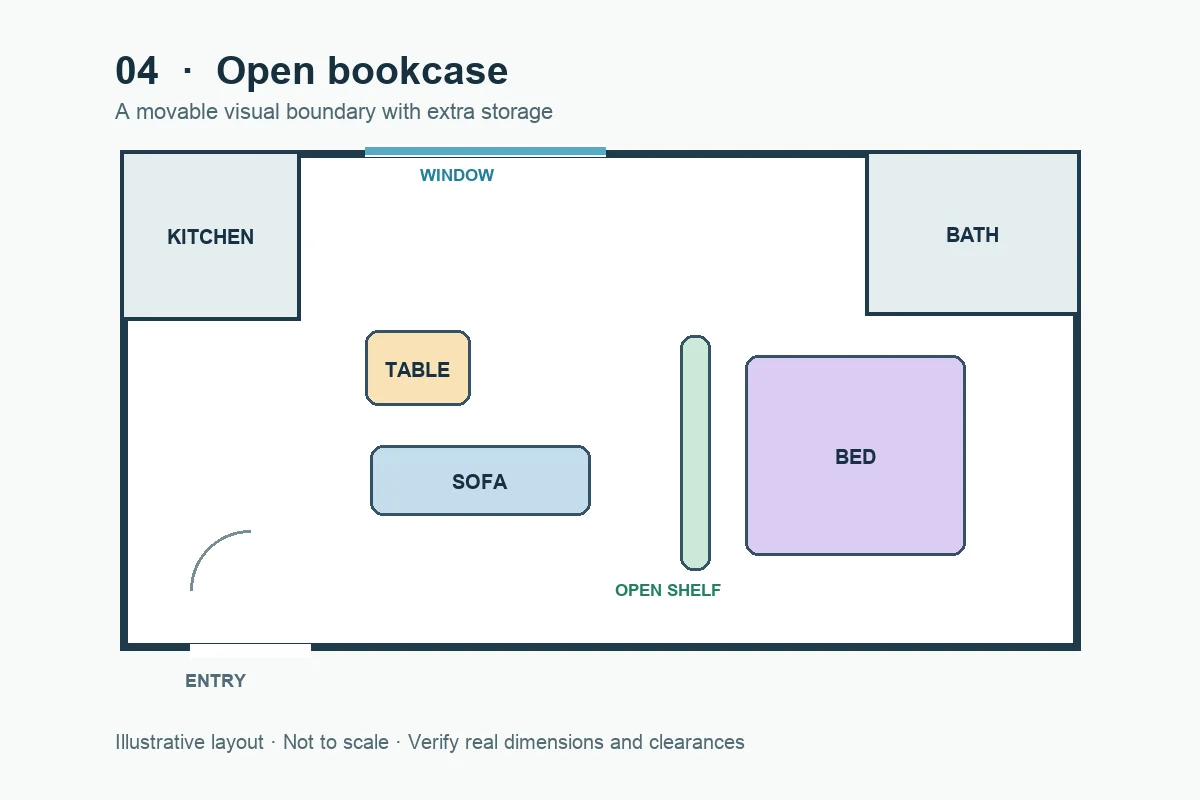
Best for: Renters who want more privacy and storage without constructing a wall.
An open bookcase can mark the edge of the sleeping area while allowing light through. Keep frequently used items accessible from the side where you need them. Avoid a tall, visually heavy unit if the bed is near the room's only window. Anchor furniture where the manufacturer recommends it, and check your lease before attaching anything to a wall.
Try it in RoomDesign: Use a room-photo preview to compare an open divider, a curtain, and no divider from the same camera angle. Judge each by daylight and sightlines, not just style. Confirm shelf depth and stability separately; an AI preview does not establish either.
5. Run the Furniture Along One Wall
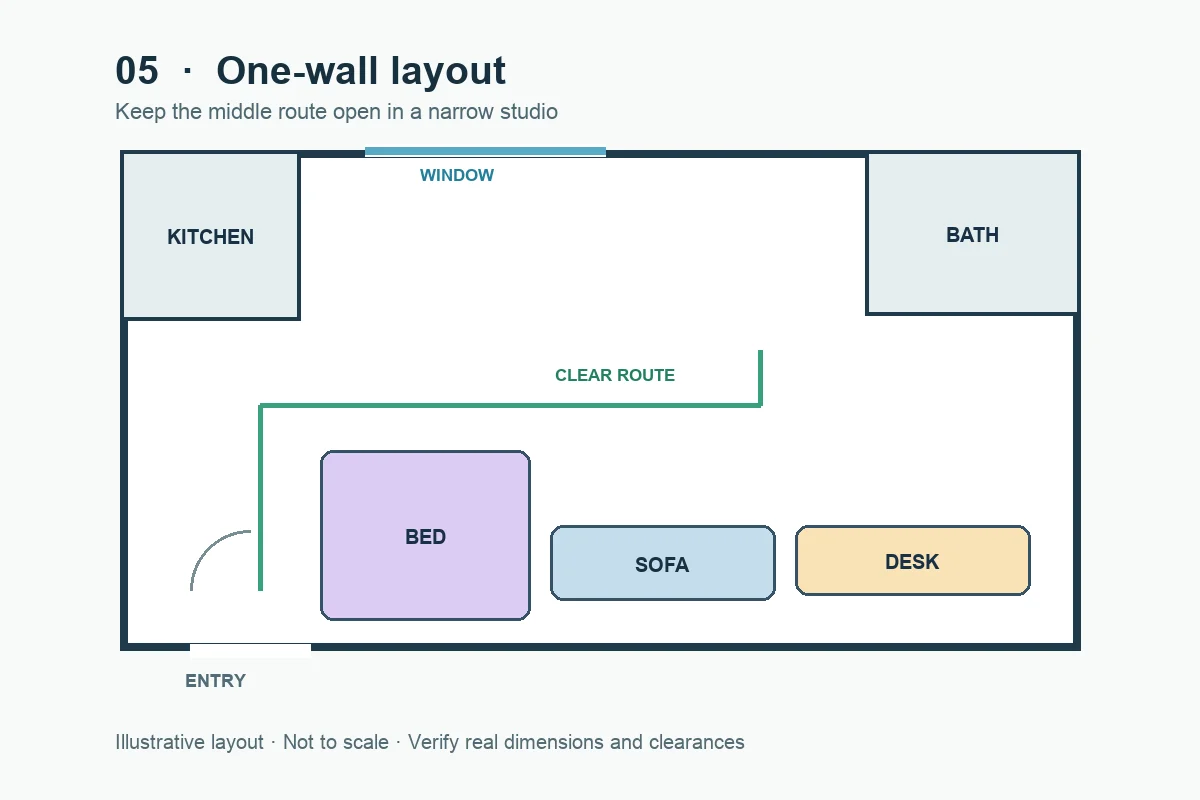
Best for: A long, narrow studio with doors or kitchen cabinets on the opposite side.
Place the bed, storage, and perhaps a compact desk along the less interrupted wall. Keep the center route as continuous as possible. Where the kitchen is fixed along one wall, avoid adding furniture directly opposite appliance and cabinet doors until you have checked their full swing. This arrangement may feel simpler than a more elaborate zoning scheme, but it often makes a narrow space easier to use.
Try it in RoomDesign: Set the approximate area and shape in the AI Floor Plan Generator, then compare a single-wall furniture arrangement with a layout that puts one large piece across the room. Use the 2D view to identify potential pinch points. Verify them in the actual apartment with furniture dimensions and door clearances.
6. Give the Window to the Activity That Needs It Most
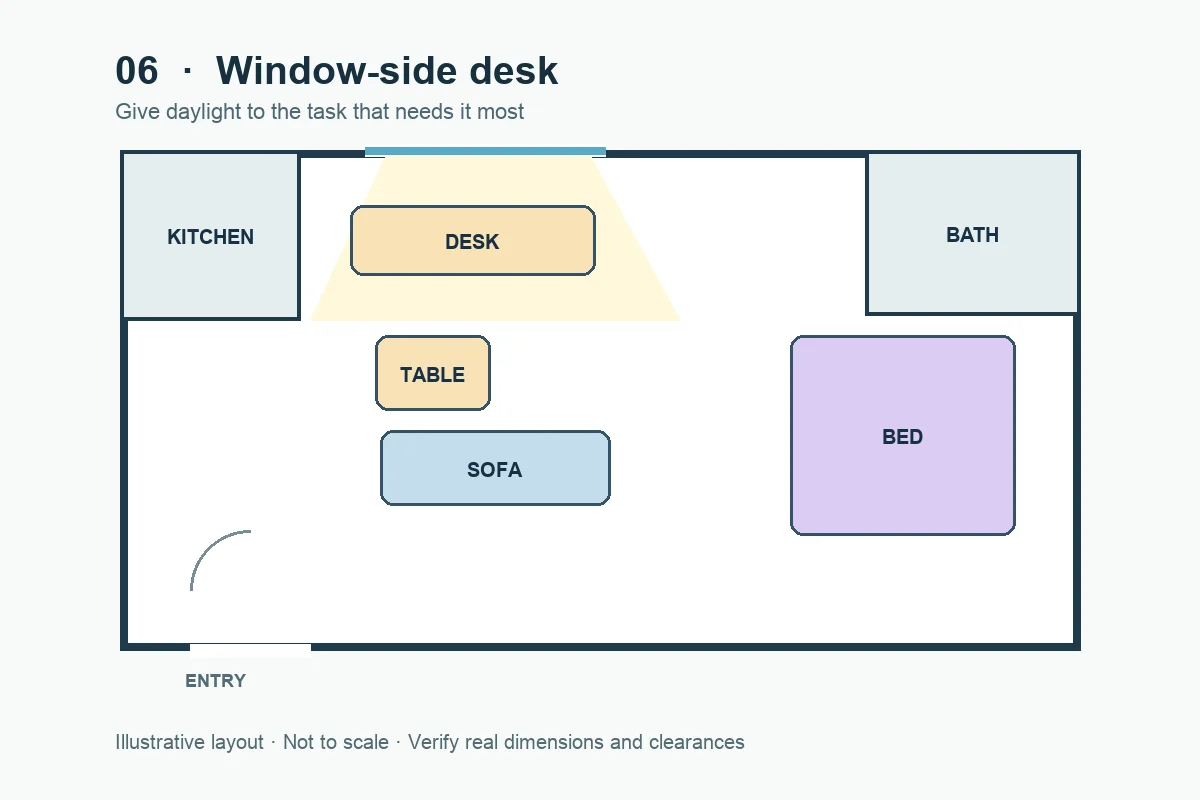
Best for: A studio where a window is the only strong source of daylight.
If you work from home, a desk near the window may be more valuable than a bed there. If you rarely use a desk, the window could instead serve a small dining or reading area. Consider screen glare and the position of heating or cooling equipment before settling on either. Keep tall storage out of the light path when possible.
Try it in RoomDesign: Compare two versions: desk by the window and bed by the window. Use the Room Planner's photo view to assess how each choice changes the sense of openness. Visit the room at different times of day before making a final decision; a single image cannot show changing light or glare.
7. Let One Table Handle Meals and Work
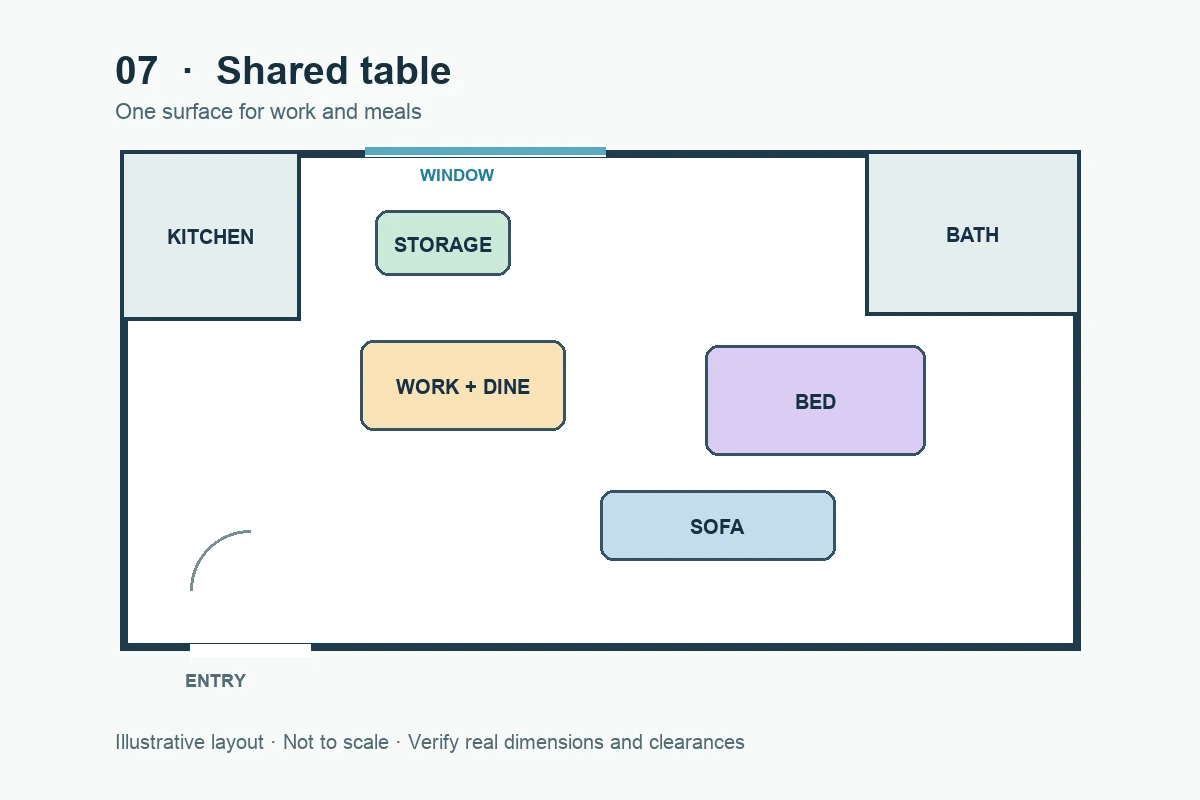
Best for: A small studio that needs both a desk and dining space but has room for only one table.
A table near the kitchen can serve meals, laptop work, and occasional guests. A wall-mounted drop-leaf or compact expandable table may preserve floor space when not in use. This works best when you can put work materials away quickly; otherwise dinner means clearing a permanent office. Plan storage for chargers, papers, and dining items as part of the layout.
Try it in RoomDesign: Compare a dedicated desk plus dining table against one shared table. In the floor-plan concept, check what happens when chairs are pulled out, not only when they are tucked in. Use a photo preview to see whether the shared table visually connects the kitchen and living area.
8. Choose a Sofa Bed or Wall Bed for a Daytime Living Room
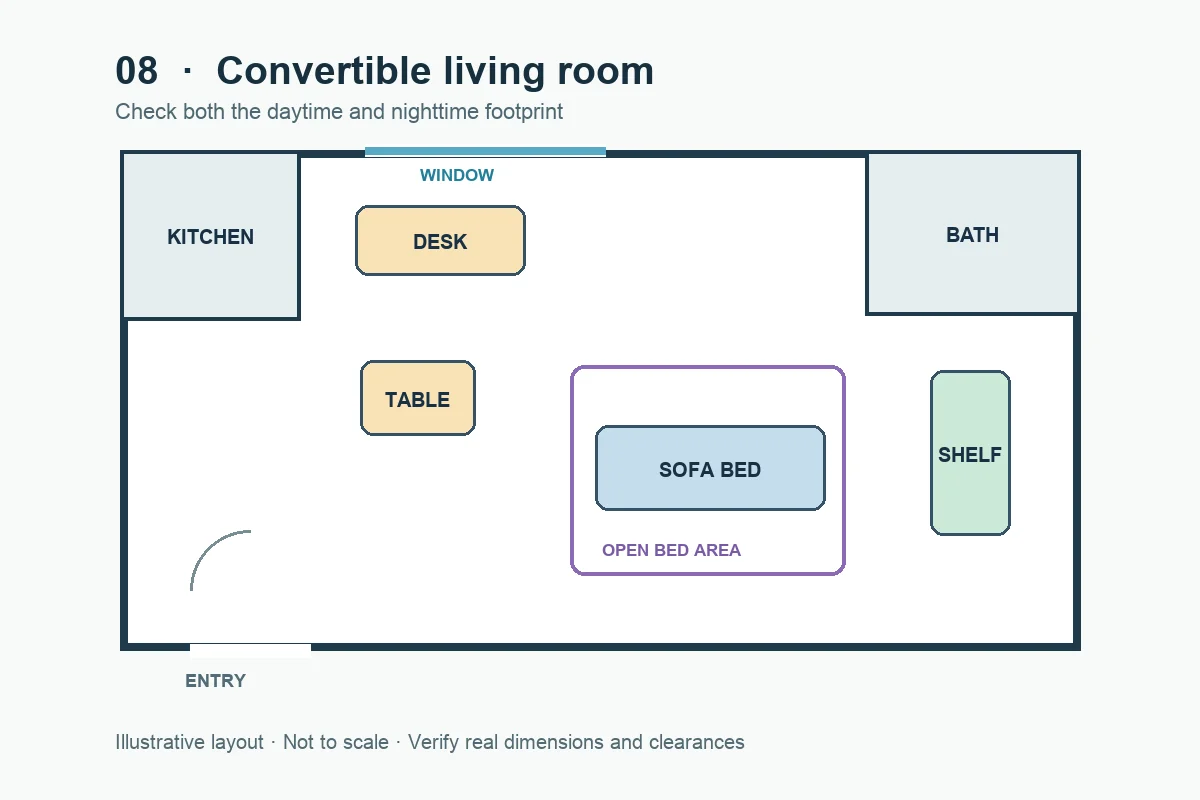
Best for: A very small studio where an open daytime floor matters more than leaving a bed ready all day.
A sofa bed can make room for seating without dedicating a separate zone to a permanent bed. A wall bed may free more floor area, but it involves a larger purchase and careful installation. Both options have a daily cost: you must make the conversion easy enough that you will actually use it. Check the furniture's full open dimensions, bedding storage, and any installation requirements before committing.
Try it in RoomDesign: Explore the studio in its daytime and nighttime states as two separate concepts. A single attractive daytime render can hide the problem of where chairs or a coffee table go when the bed opens. Mark both furniture footprints on your measured plan.
Which Studio Apartment Layout Should You Choose?
| Your priority | Start with | Check before committing |
|---|---|---|
| A full-size bed | Corner bed or alcove bed | Access around the mattress and the view from the entrance |
| A distinct living area | Sofa divider | Walking space on both sides and the sofa's actual depth |
| Privacy in a rental | Curtain or open bookcase | Daylight, stability, and lease restrictions |
| Daily work from home | Window-side desk and shared dining table | Glare, outlets, and where work items will go |
| Maximum daytime floor | Sofa bed or wall bed | The fully open bed footprint and daily setup |
| A long, narrow room | Furniture along one wall | Cabinet doors, appliance access, and the central route |
Do not choose by floor area alone. Two studios of the same size can need entirely different arrangements because their windows, kitchens, doors, and wall lengths differ.
A RoomDesign Workflow for Comparing Your Top Three Ideas
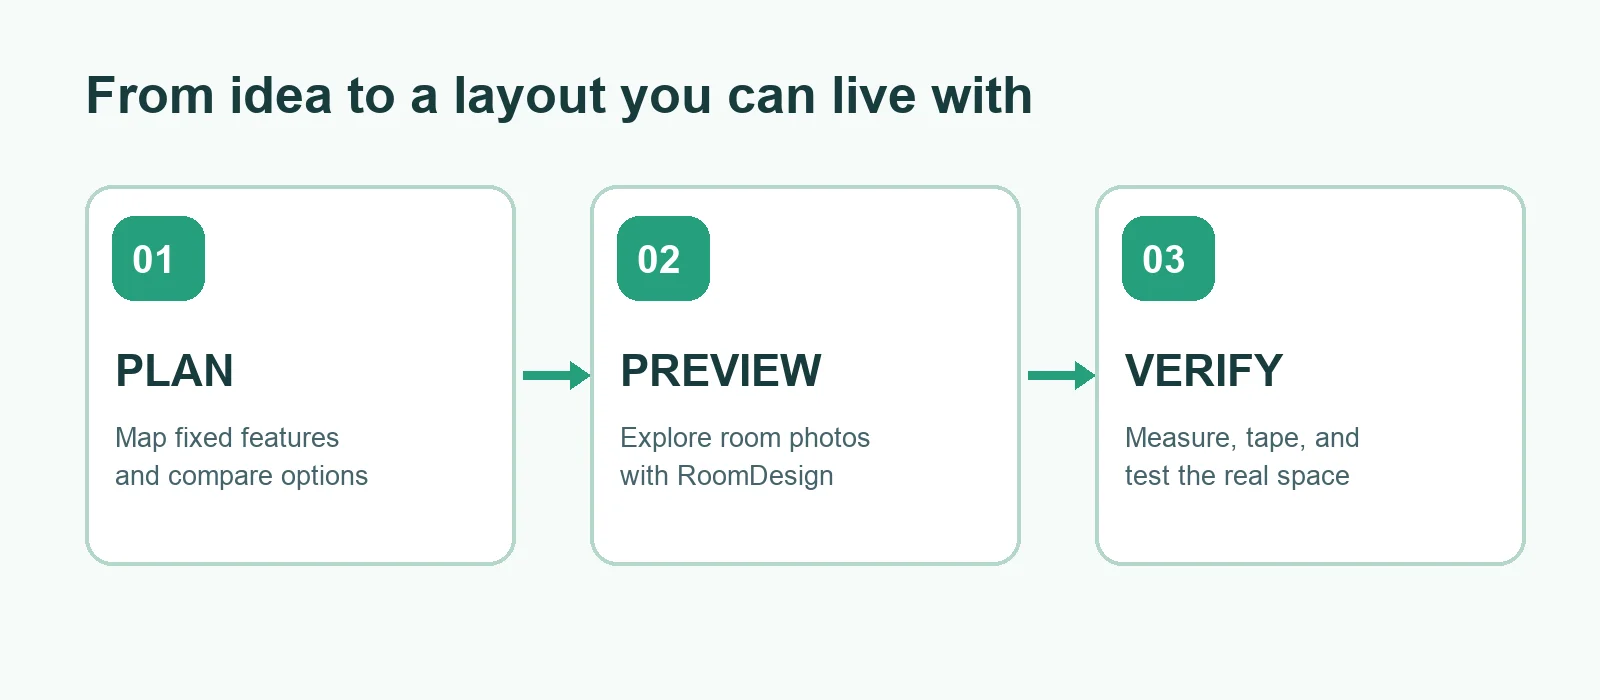
- Record the fixed conditions. Measure the room and furniture, photograph the space from two corners, and note what cannot move. Remove personal details from photos before uploading if privacy matters to you.
- Make distinct concepts. In RoomDesign's floor-plan tool, set the relevant area, unit, floor shape, and room requirements. Compare three meaningful directions—for example, corner bed, sofa divider, and shared-table layout. If a generated plan changes your real kitchen or window position, reject that part of the image.
- Preview the lived-in room. Upload a clear photo to AI Room Planner. Use Auto Layout or Space Redesign to explore arrangements, then use Style Makeover only after the basic placement works. A pleasing color palette should not rescue a poor floor plan.
- Score each option. Give each a simple pass or fail for bed access, walking route, kitchen use, daylight, work or dining needs, and storage. Note the compromises rather than declaring one render “best.”
- Test the winner physically. Mark the proposed bed, sofa, table, and divider footprints with removable tape or cardboard. Open doors and drawers, sit where you would work, and walk the usual routes. Revise the plan before purchasing large furniture.
The screenshots below show the actual product controls. The custom floor-plan brief was entered to illustrate the input workflow; no layout was generated from it for this article. The room-planner before-and-after image is RoomDesign's own sample preview.
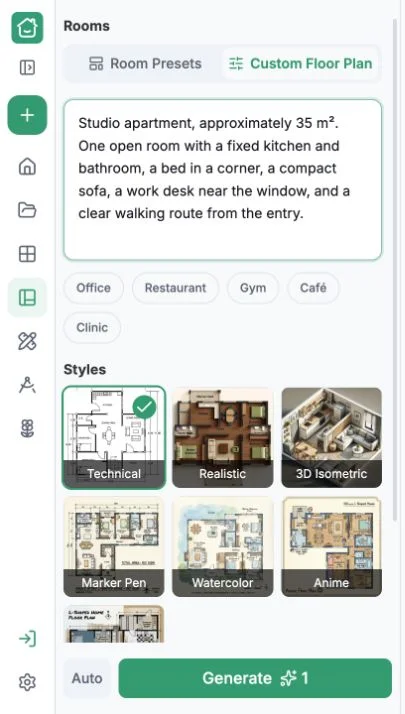
If you are planning permanent wall, electrical, or plumbing changes, consult qualified local professionals. RoomDesign provides concepts and visual comparisons, not verified construction drawings.
Frequently Asked Questions
Where should the bed go in a studio apartment?
Start with an alcove or a quiet corner that does not interrupt the main route. If neither works, use the sofa or a light divider to give a more exposed bed a visual boundary. The right location depends on your actual openings, noise, and bed dimensions.
How do you divide a studio without making it feel smaller?
Try a sofa back, open bookcase, curtain, or rug before considering a solid partition. Choose the lightest option that gives you enough separation, and check the view from both the entrance and the window.
Can RoomDesign tell me whether furniture will fit?
RoomDesign can help you explore and compare layouts visually. Confirm the result against measured room and furniture dimensions, including open doors, drawers, and convertible beds, before buying or installing anything.
Do I need both a desk and a dining table?
Only if both have distinct, frequent uses and your room can accommodate them comfortably. Many studios work better with one table and nearby storage that makes switching activities easy.
Make the Layout Work in Real Life
The strongest studio apartment layout idea is the one that supports your ordinary day: getting out of bed, preparing food, working, relaxing, and moving through the room without obstacles. Use RoomDesign to explore alternatives and visualize how they might feel, then let measurements and a physical test settle the decision.